
All you need to know about Bathroom Renovation
Renovating a bathroom can feel overwhelming, particularly without thoughtful planning and attention to detail. Your new bathroom should be an exciting transformation that brings satisfaction—not a stressful project you’ll come to regret. The bathroom is often the first area tackled in a full home remodel, as its complex plumbing, electrical, and HVAC systems make proper renovation essential. In any remodelling there are a few aspects that are very much connected and should be organized in a structured, efficient and orderly manner.
The good news is, we’ve covered all the essentials to help take the stress out of the process. From staying on budget to maintaining a cohesive color scheme and design, here are our nine must-know tips to help you create the bathroom of your dreams.


● Design and Trend
When updating your bathroom, it’s easy to be drawn to the latest trends. But to avoid a space that feels out of sync with the rest of your home, it’s important to align the design with your overall interior style.
A minimalist, timeless look offers a versatile foundation—allowing you to play with textures and décor while keeping future updates simple. It also appeals to potential buyers, who can easily envision personalizing the space without major changes.
Tiles
a. Tile Size – Selecting the right tile size is closely tied to the dimensions and layout of your bathroom. For instance, large or slab tiles may not be suitable for spaces with low ceilings, as they can make the room feel more confined. In such cases, longer, narrow tiles—similar to laminate planks—can help elongate the walls and enhance the visual height of the space.
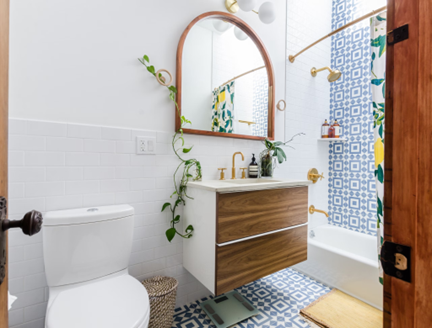
b. Tile Design - When it comes to design, incorporating a mix of light and dark tiles can enhance visual contrast, adding depth and sophistication to your bathroom. This approach not only elevates the overall aesthetic but also creates a balanced and stylish look.
c. Why Tile Size matters - From a functional standpoint, tile size significantly impacts the performance of your bathroom—especially in sloped areas where effective drainage is crucial. Smaller tiles are better suited for these zones, as their flexibility allows them to conform to gradients more easily, ensuring smooth water flow. Ultimately, selecting the right tile size is essential not only for visual harmony but also for long-term functionality.
d. Colours – As previously noted, color plays a significant role in enhancing the appearance of your space. However, it’s equally important to consider the maintenance requirements of the tile surface. Some darker tiles, for example, may appear noticeably different when wet. To ensure the best choice for both aesthetics and practicality, it's advisable to consult with a representative from the tile supplier for expert guidance.
2. Bathroom furniture
a. Size – Ensure that all furniture is appropriately sized to fit your space. The dimensions of your furniture can also influence the perceived size of your bathroom, making it appear either more spacious or more compact.
b. Services – Some bathroom units come with added features that require additional services, such as a heated toilet seat, jacuzzi shower cabin, or other electric-powered elements. These features will likely need a dedicated power source, which may require running new wiring from your fuse box or even upgrading the fuse box itself. This illustrates how bathroom design is not only confined to the bathroom but can also impact other areas of your home.
3. Lighting
a. Size and Position – The size and placement of lighting are crucial elements in bathroom design. We highly recommend consulting with your builder or, ideally, a lighting designer to ensure optimal results. Proper lighting can either enhance your design or, if poorly executed, significantly detract from the overall effect.
● Architectural and Structural drawings
Architectural and structural drawings are essential components of any bathroom renovation, providing a clear blueprint for the project's execution. Architectural drawings outline the layout, dimensions, and design features, ensuring the new bathroom aligns with the overall flow of the home. Structural drawings, on the other hand, detail the framework, load-bearing elements, and any necessary reinforcements—especially important when relocating fixtures or modifying walls. These technical documents help contractors avoid costly errors, ensure compliance with building codes, and support accurate planning for plumbing, electrical, and ventilation systems. Investing in proper drawings from the outset lays the groundwork for a smooth, safe, and successful renovation.
● Overview of the Bathroom Renovation Process
The following outlines the typical sequence of steps involved in a bathroom renovation. Please note that the order may vary based on the specific design and requirements of the project.
1. Review Design and Drawings – Carefully examine the design and technical drawings to ensure all details are correct.
2. Consult with Professionals – Engage with architects, structural engineers, and designers to discuss every aspect of the design in detail.
3. Demolition – Remove existing fixtures, tiles, and structures to prepare the space for renovation.
4. Surface Preparation – In most renovations, walls, ceilings, and floors are often uneven. Begin by creating right angles and leveling all surfaces, which will facilitate the installation of tiles and furniture designed with precise angles.
5. Chase for Services – Run plumbing, electrical, and HVAC lines as needed.
6. Testing – Conduct thorough tests to ensure all systems are functioning properly before proceeding.
7. Seal Walls and Floors – Close up the walls and floors, ensuring proper alignment and preparation for finishing work.
8. Skim Coat Walls and Paint – Apply a skim coat to the walls, followed by the first layer of paint. Reserve the final coat of paint for later.
9. Install Floor Tiles – Lay the floor tiles, ensuring proper alignment and adhesion.
10. Install Wall Tiles – Fit the wall tiles, paying close attention to uniformity and placement.
11. Ceiling Installation – Close the ceiling, ensuring that the sheetrock sits above the tiles for a seamless finish.
12. Skim Coat and Paint Ceiling – Apply a skim coat to the ceiling, followed by all necessary layers of paint.
13. Install Bathroom Furniture – Fit the vanity, toilet, and any other furniture or fixtures as specified in the design.
14. Final Coat on Walls – Apply the final coat of paint to the walls for a polished look.
15. Apply Silicone – Seal all edges with silicone to ensure proper waterproofing and finish.
Following these steps ensures a thorough and well-executed bathroom renovation, leading to a polished and functional result.